

Git and GitHub are the most important tools that a devops engineer must always carry in his toolkit.
Before diving into the specifics of these two, let us understand the basic workflow of a software development firm. Then you will understand why these tools will be useful in your development journey.
A company, say Example.org, have several different projects. 3–4 persons probably might be working on a particular project. Say the project is to build a website. So one person will be working on the HTML side; other person will be working on the CSS ( used to prettify the website ) and the third person may be working on the back-end; that is the server side code which includes the databases and all.
After finishing each feature of the project, each of them will upload their code to a common folder in the cloud. Before the code is saved to that folder, it needs to be reviewed so that there are no errors in the code. The code reviewing can be done by other team members. If everything is OK, then we can move the changes to the common folder. Or else they can suggest some review changes. After doing the changes, and if the reviewers approve, then it can be moved to the main folder.
This is the basic workflow that happens in a company. Now let’s come to the specifics. The common folder in the cloud is called a repository or repo.
The cloud in which the repository is hosted is the so-called GitHub.
What is Git and why is it important?
Git is a version control tool that helps a developer to track what all changes that he has done in his code. Take the example of a simple calculator program in your favorite programming language. The user inputs the first and second number and then the user selects an option; say there is addition and subtraction. According to his selection, the program returns him a result. If he selected addition, then the result will be the summation of the two numbers. If he chose subtraction, then the result will be the difference of the two numbers.
Now he developed this calculator program and saved it. Now he needs a new functionality to his calculator, say multiplication. So he writes a method that accepts two numbers and return the multiplied result back. After writing the new functionality, he saves it again. Now his boss says that the client doesn’t need the new functionality. He only needs addition and subtraction. So what does he do now?
He need to go back and remove the code for multiplication right? Since this is a small program, it is easier to do. In companies, sometimes a task assigned to a person will require making changes to several files. And after making all the changes, suppose the boss says that the new change is not necessary for now. What will you do? Will you go back and rewrite the code?
This is where Git comes to the picture. If we had used git for saving, then each time we save, it is going to be saved as a different save point. Remember we had saved our program after writing the addition and subtraction functionality of our calculator. Now think it was done using git. This will be saved as savepoint1. Now we add the new multiplication functionality. It will be the savepoint2. Now the boss comes and says that the new functionality is not needed. What are you going to do? Simple. Switch to savepoint1. Work done.
In git each of these save points are termed as hashes. Each hash is a 40 character long hex digit, since it uses SHA-1 algorithm to create the hash.
What is difference Between Main Branch and Master Branch?
Branches enable Git users to isolate changes from the main codebase or other ongoing development projects. Each branch maintains its own set of commits, allowing the users to work on new features, bug fixes, or experiments without affecting the stability of the main branch.
This write-up will demonstrate the distinctions between the “main branch” and “master branch”.
Can you explain the difference between Git and GitHub?
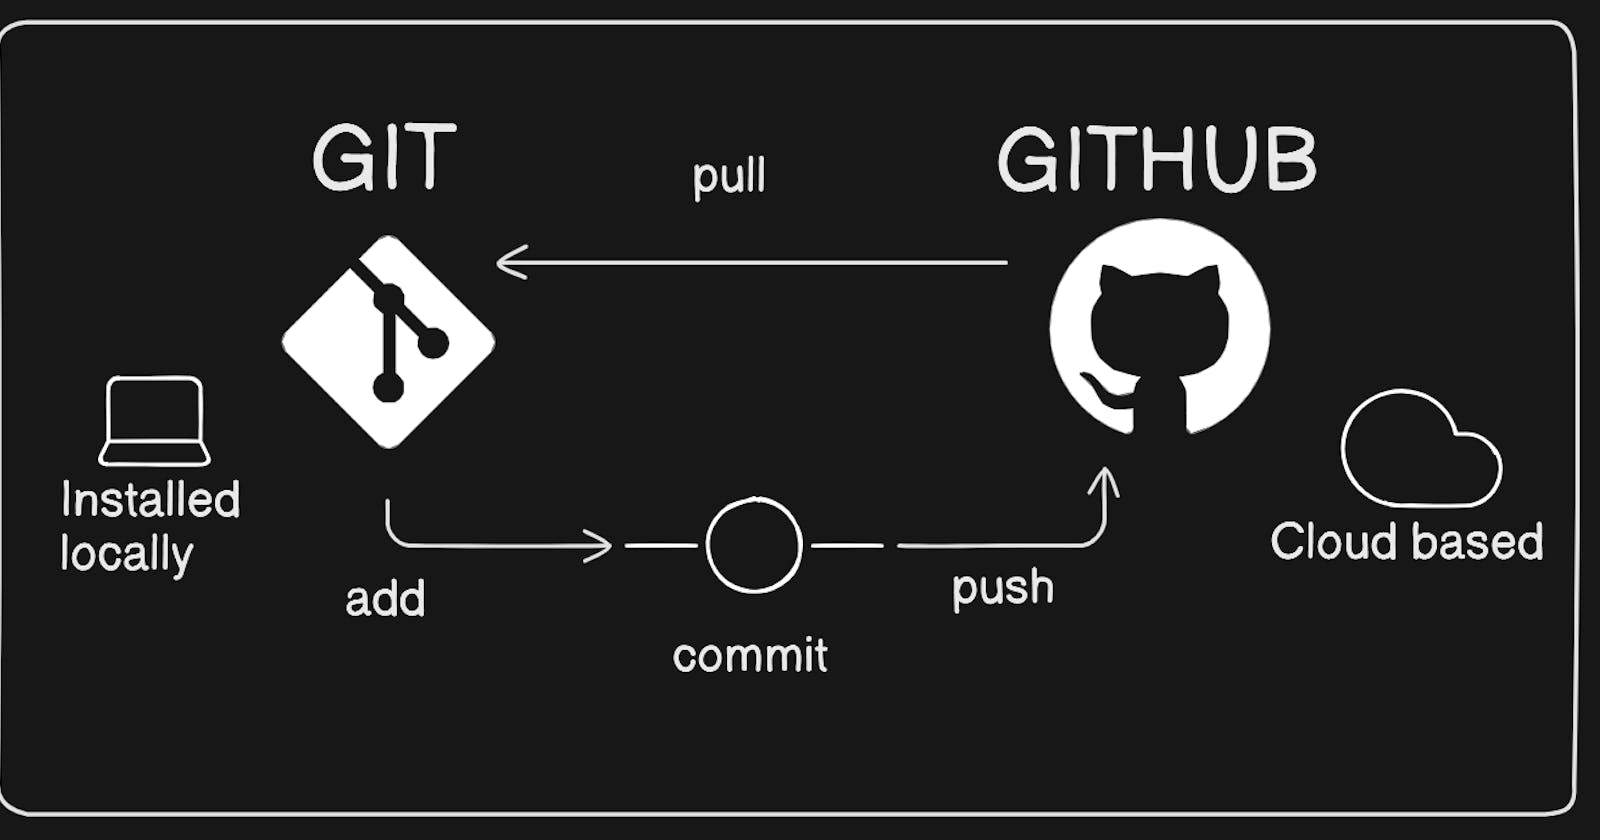
Git is a version control system that allows developers to track changes in their code. GitHub is a web-based hosting service for git repositories. In simple terms, you can use git without Github, but you cannot use GitHub without Git. Take note of the following illustration for further information on the distinctions between the two.
The answer to this question depends on your needs. If you're working on a personal project or don't need the features of GitHub, then Git is a great choice. However, if you're working on a project with other people, GitHub is the better choice. Its robust features and user-friendly interface make it the best platform for collaboration.
By using Git and GitHub, you can access your code from any computer. If your local machine was to get damaged or stolen, for example, you would lose all of your code with no way to retrieve it. However, if you store your code on GitHub, which is a cloud-based service, you never have to worry about losing it.
Git and GitHub are great tools to consider when working on any coding project. Be sure to weigh the pros and cons of each to decide which is best for you and your project.
How do you create a new repository on GitHub?
Creating a new repository on GitHub is straightforward. Here's a step-by-step guide:
Sign in: Log in to your GitHub account at github.com.
Navigate to Your Profile: Once logged in, click on your profile icon at the top right corner of the page to access your profile.
Create New Repository: On your profile page, click on the "+ dropdown" button next to your profile picture. From the dropdown menu, select "New repository."
Fill in Repository Details: You'll be directed to a new page to create a new repository. Here, you'll need to provide the following details:
Repository name: Choose a name for your repository.
Description: Optionally, provide a brief description of your project.
Visibility: Choose between making your repository public (visible to everyone) or private (accessible only to you and selected collaborators).
Initialize this repository with a README: Optionally, select this option if you want to initialize your repository with a README file. This file can provide an overview of your project, instructions, or any other relevant information.
Add Optional Settings: You can also add optional settings such as choosing a license, adding a .gitignore file (specifies which files should be ignored by Git), or choosing a template for your repository if applicable.
Create Repository: Once you've filled in the necessary details, click on the "Create repository" button.
Congratulations! You've successfully created a new repository on GitHub. You can now start adding files, collaborating with others, and managing your project using Git commands or through GitHub's user-friendly interface.
What is difference between local & remote repository? How to connect local to remote?
The local repository is a Git repository that is stored on your computer.
The remote repository is a Git repository that is stored on some remote computer.
The remote repository is usually used by teams as a central repository into which everyone pushes the changes from his local repository and from which everyone pulls changes to his local repository.
When you are finished with doing changes into your workspace, you can add them to staging area and from there you can commit the changes to your local repository. This can be done even when you are disconnected from the internet and nobody else can see the changes in your local repository.
Once you decide it's a good time to share the changes, you push the changes from your local repository to the remote repository. This copies the changes from .git folder on your local computer to .git folder on the remote computer. From this moment, your changes are visible to people who have access to the remote repository.
They can pull your changes from the remote repository to their local repository and then integrate the changes into their workspaces.
In similar way you can pull changes of the others from from the remote repository to your local repository and then integrate the changes into your workspace.
Tasks
Task-1:
Set your user name and email address, which will be associated with your commits.


task-2:
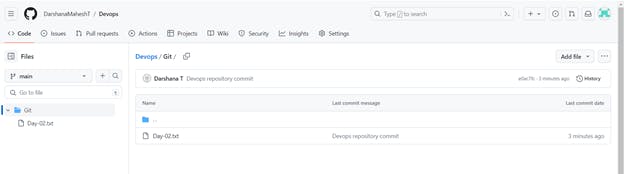
Create a repository named "Devops" on GitHub
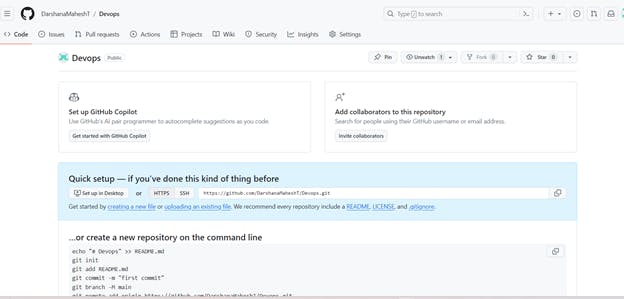
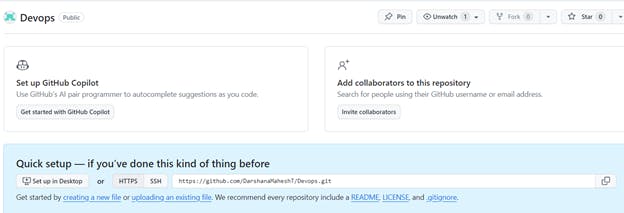
Connect your local repository to the repository on GitHub.

Create a new file in Devops/Git/Day-02.txt & add some content to it

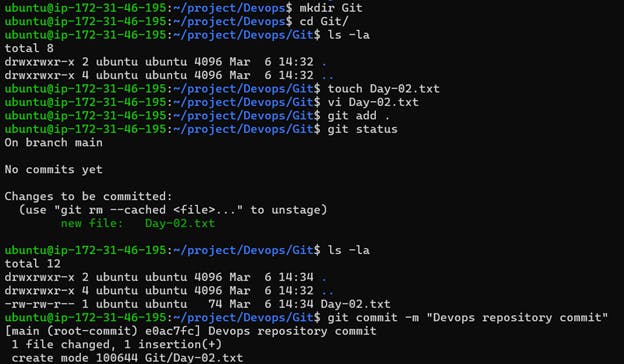
- Push your local commits to the repository on GitHub

Thanks for reading...!!!
Happy Learning....!!!!!